The Shopify Integration for Zoho CRM enables businesses to seamlessly connect their e-commerce operations with their customer relationship management system. By integrating Shopify with Zoho CRM, organizations can automatically synchronize customers, products, inventory, and orders into a single, centralized platform.
This guide demonstrates how to connect Shopify to Zoho CRM, configure ShopifyZoho CRM data synchronization, manage field mapping, monitor sync activity, and troubleshoot integration errors.
How to Install and Connect Shopify with Zoho CRM #
This section explains how to install the Shopify Integration for Zoho CRM and securely connect your Shopify store to Zoho CRM. Once connected, customer, product, order, and inventory data can be synchronized based on your configuration settings.
Step 1: Install Shopify Integration from Zoho Marketplace
To begin setting up the Shopify Integration for Zoho CRM, you must first install the extension from the Zoho Marketplace into your Zoho CRM account.
Installation Steps
- Log in to your Zoho CRM account.
- From the top navigation bar, open the Marketplace.
- Search for Shopify Pro for Zoho CRM.
- Select the extension from the results.
- Click Install and follow the on-screen prompts to complete installation.
Once installed, the extension will be available within Zoho CRM and can be accessed from the module menu.
Step 2: Connect Shopify Store to Zoho CRM
After installing the extension, the next step is to securely connect your Shopify store with Zoho CRM. This connection allows the integration to authenticate your store and prepare it for data synchronization.
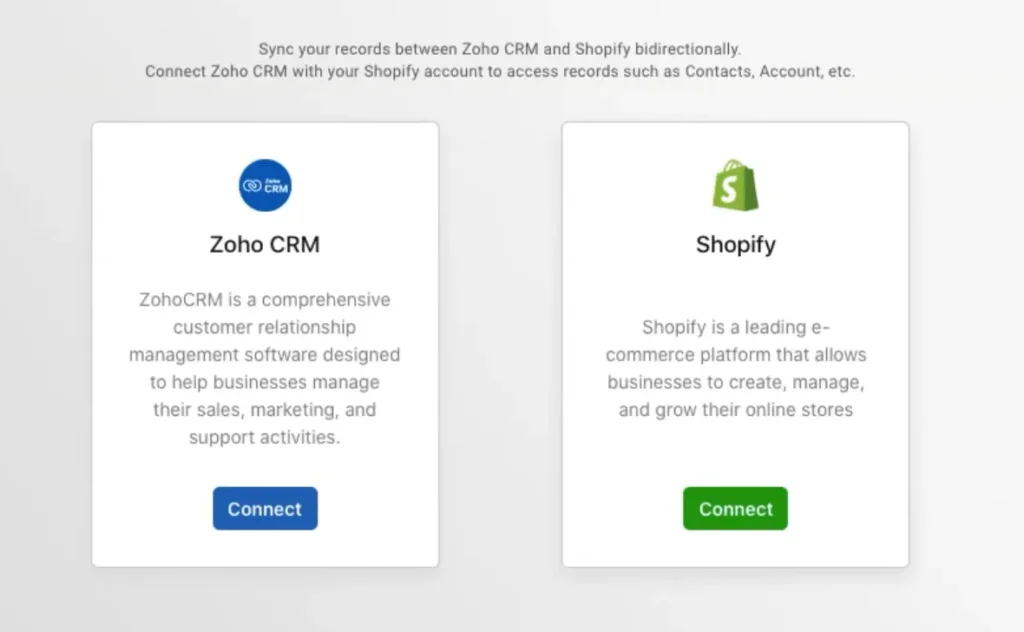
Connect Shopify Account
- Open the Shopify Integration for Zoho CRM inside Zoho CRM.
- Navigate to the Connect tab.
- Click Connect under the Shopify section.
- Log in to your Shopify account.
- Select the Shopify store you want to integrate with Zoho CRM.
Once selected, the Shopify authorization window will be displayed.
Enter Store Details
In the authorization screen
- Enter your Shopify Store Name
- Enter the Admin API Access Token
The API access token is generated from your Shopify store and is required to securely authenticate the connection.
At this stage, no data is synced. The connection simply authorizes Zoho CRM to communicate with your Shopify store.
Step 3: Generate Shopify Admin API Access Token
To securely connect your Shopify store with Zoho CRM, you must generate an Admin API access token from your Shopify store. This token allows Zoho CRM to read and sync data based on the permissions you grant.
Generate API Credentials in Shopify
- Log in to your Shopify admin panel.
- Navigate to Settings → Apps and sales channels.
- Click Develop apps.
- Select Create an app.
- Enter an app name (for example, Zoho CRM Integration) and click Create app.
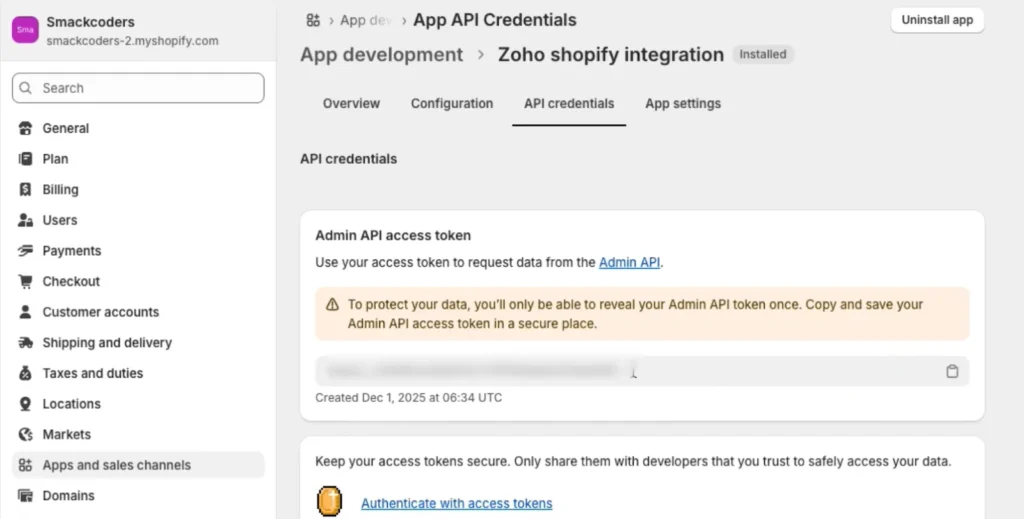
Configure Admin API Permissions
- Open the newly created app.
- Go to Configuration → Admin API configuration.
- Enable Read and Write permissions for the following modules:
- Customers
- Products
- Orders
- Click Save.
These permissions define what data Zoho CRM can access and synchronize.
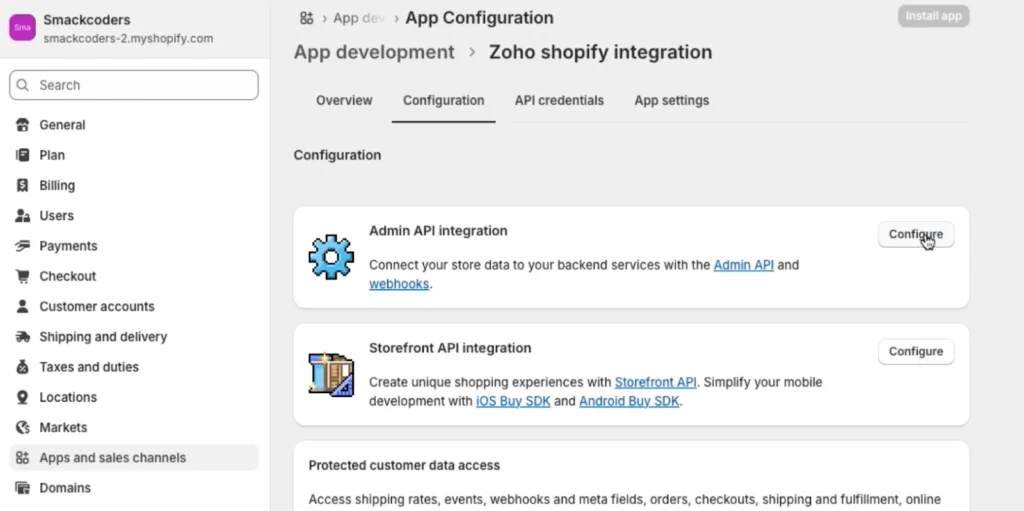
Install App and Generate Token
- Navigate to API credentials within the app.
- Click Install app.
- Confirm installation when prompted.
- Once installed, the Admin API access token is generated.
- Click Reveal token, copy it, and store it securely.
Paste this token into the Shopify connection screen in Zoho CRM to complete the authorization.
Step 4: Connect Zoho CRM Account
After generating and entering the Shopify Admin API access token, the final step in the connection process is to authorize Zoho CRM. This authorization allows the integration to access CRM modules and prepare the system for data synchronization.
Authorize Zoho CRM
- In the Shopify Integration setup screen, locate the Zoho CRM section.
- Click Connect.
- Review the permission request displayed on the authorization screen.
- Click Accept to grant access.
Once authorized, Zoho CRM is successfully connected to your Shopify store.
Configure Shopify Zoho CRM Data Synchronization Settings #
After connecting Shopify and Zoho CRM, configure how data is synchronized between the two systems. These settings determine sync direction, modules, frequency, and conflict handling, ensuring data flows according to your business requirements.
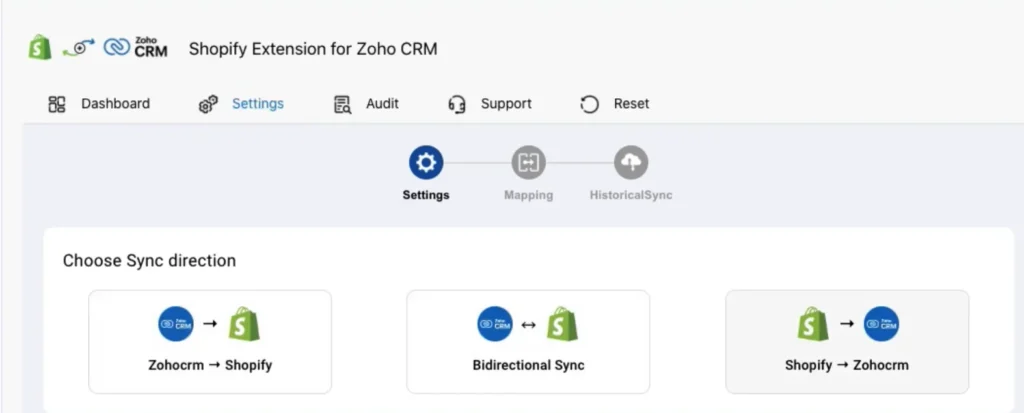
Sync Direction
Choose how records are synchronized between Shopify and Zoho CRM
- Shopify → Zoho CRM – Import Shopify data into Zoho CRM
- Zoho CRM → Shopify – Push CRM updates to Shopify
- Bidirectional Sync – Sync updates from both platforms
Select the option that best aligns with your operational workflow.
Module Selection
Enable synchronization for specific modules only
- Customers
- Products
- Orders
- Inventory
Modules can be enabled or disabled independently without affecting other synced data.

Sync Frequency (CRON Scheduler)
Configure how often automatic sync runs:
- Default: Every 3 minutes
- Optional: Every 5 minutes or 1 minute (available via support)
Frequent sync intervals ensure near real-time data accuracy.

Conflict Resolution
Define which system takes priority when the same record is updated in both platforms:
- Zoho CRM Priority – CRM data overwrites Shopify
- Shopify Priority – Shopify data overwrites CRM
This prevents unintended data overwrites and maintains consistency.

Configure Field Mapping for Shopify Integration for Zoho CRM #
Field mapping defines how data fields from Shopify are matched with corresponding fields in Zoho CRM. Proper field mapping ensures that records are synchronized accurately and consistently across both systems.
Default Field Mapping (Shopify to Zoho CRM)
- Standard Shopify fields are automatically mapped to Zoho CRM fields
- Common fields such as customer name, email, SKU, order ID, and order status are preconfigured
- Auto-mapping reduces setup time and minimizes configuration errors
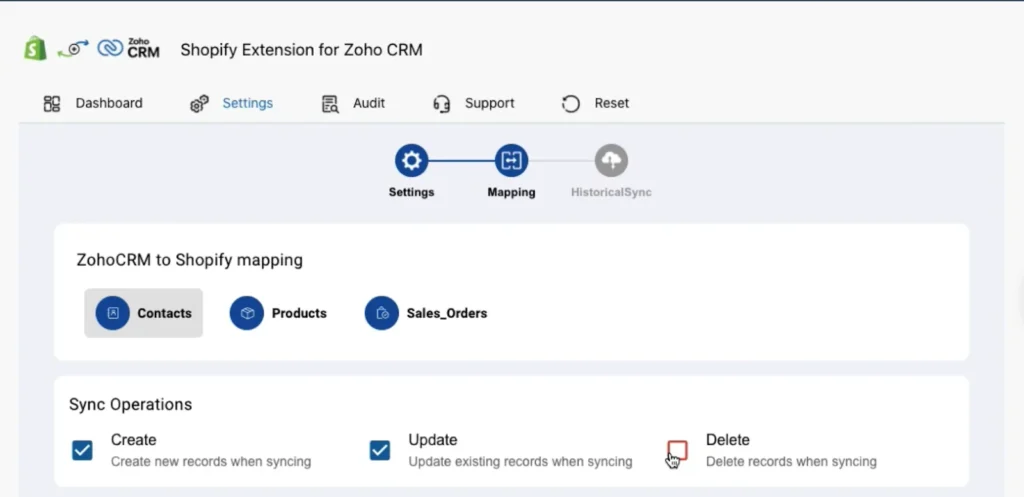
Custom Field Mapping for Shopify Zoho CRM
If your business uses custom fields in Shopify or Zoho CRM:
- Select the required module from the mapping list
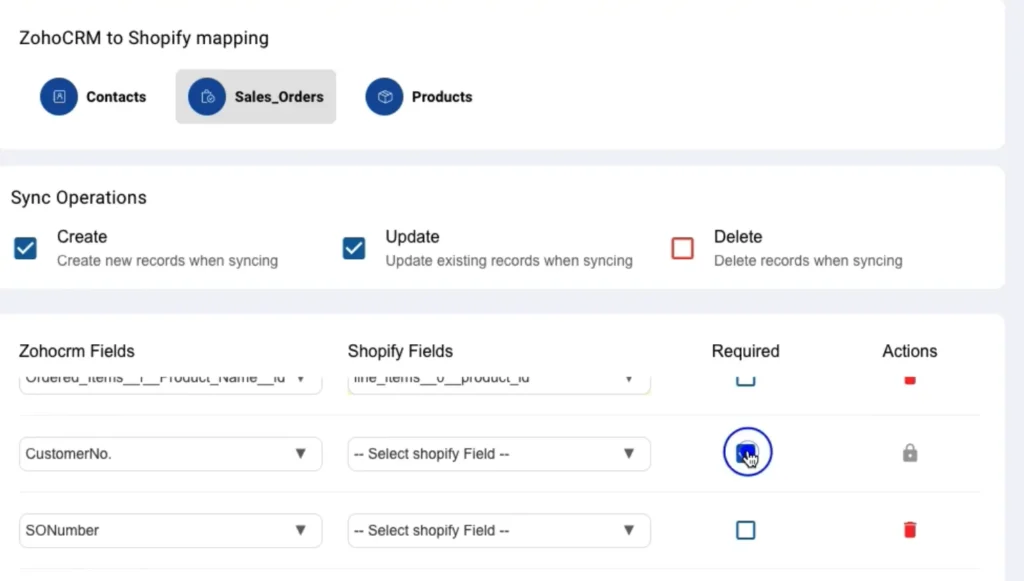
- Use the dropdown menu to map Shopify fields to Zoho CRM fields
- Add additional mappings for custom fields as needed
- Save the configuration
Custom mapping allows the integration to support unique business workflows and data structures.
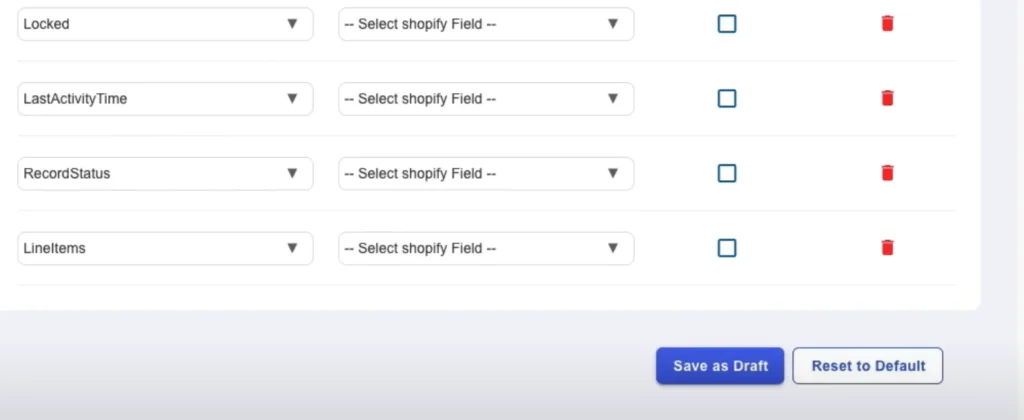
Field Mapping Management Options
- Save as Draft – Review mappings before applying them
- Edit Mapping – Modify existing field associations
- Reset Mapping – Restore default auto-mapped fields
These options provide flexibility while ensuring safe configuration changes.
Shopify Integration for Zoho CRM Sync Dashboard Overview #
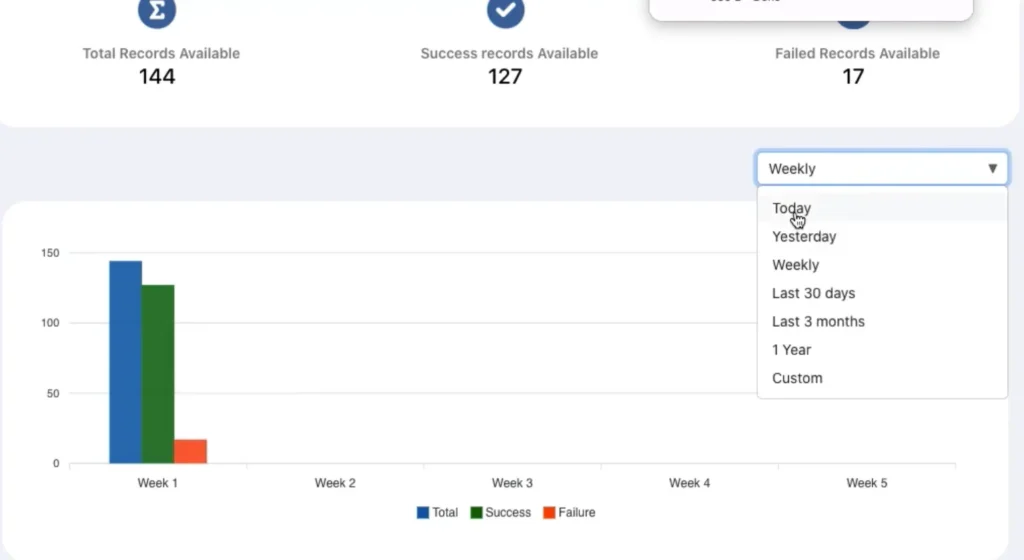
The Dashboard provides a centralized view of all synchronization activity between Shopify and Zoho CRM. It helps administrators monitor sync performance, identify issues, and verify data flow in real time.
Sync Overview Metrics
The dashboard displays key synchronization statistics, including
- Total number of records processed
- Number of successfully synced records
- Number of failed records
These metrics give a quick snapshot of overall integration health.
Visual Sync Analytics
- Graph-based visualization shows sync activity over time
- Helps identify trends, delays, or recurring failures
- Useful for performance monitoring and operational review
Date Range Filters
- Filter sync data by specific time periods
- Review sync activity for recent days or custom ranges
- Helps with audits and troubleshooting
Recent Sync Activity
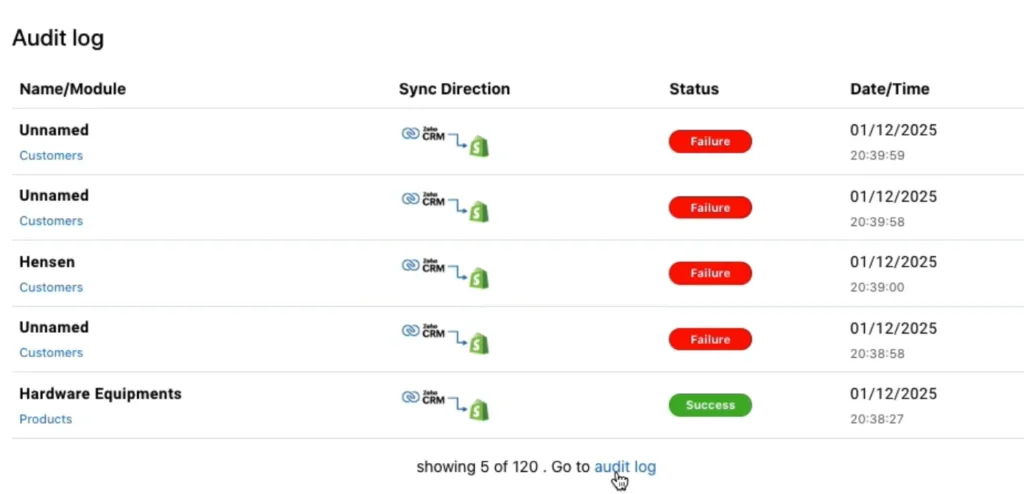
- Displays the five most recent record syncs
- Enables quick verification of recently updated records
- Provides fast access to detailed sync information
Audit Log Access
- Direct navigation to the Audit Log from the dashboard
- Allows deeper inspection of record-level sync status and errors
Historical Data Synchronization for Shopify Zoho CRM #
Historical Data Synchronization allows you to bulk sync previously existing records between Shopify and Zoho CRM. This is useful when you want to align legacy customers, products, or orders without affecting ongoing real-time sync.
When to Use Historical Sync
- After the first-time integration setup
- When onboarding an existing Shopify store to Zoho CRM
- When syncing older orders or customer records for reporting
- When recovering data after configuration changes
How Historical Sync Works
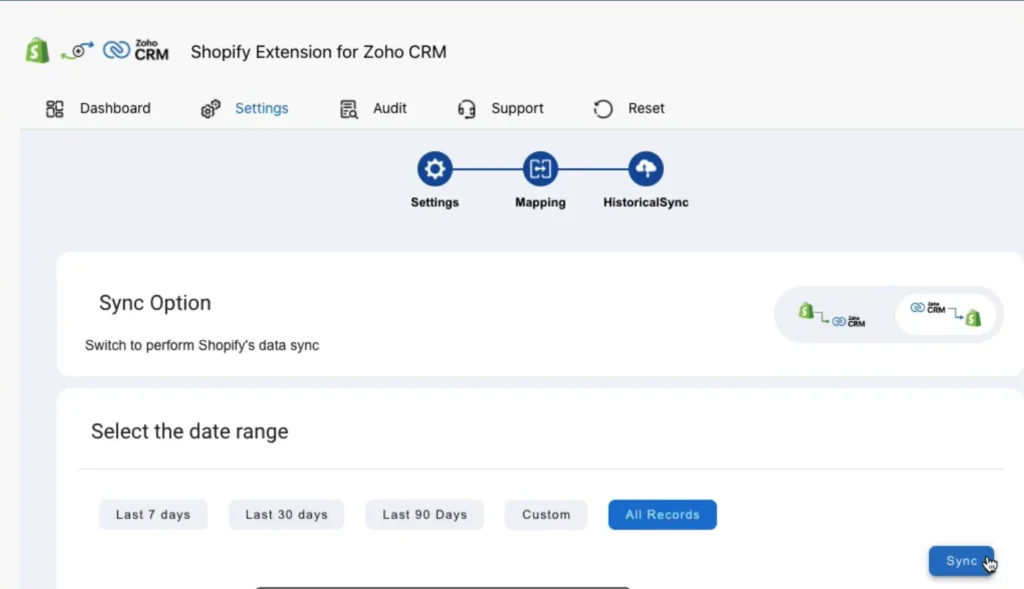
- Select the sync direction (as configured in settings)
- Choose the module to sync (Customers, Products, Orders, Inventory)
- Review the record count and estimated sync duration
- Select a date range:
- Last 7 days
- Last 30 days
- Last 90 days
- Custom date range
- Click Sync to add records to the queue
Record Limits
- Sync up to 500 records per batch
- Higher limits can be enabled by contacting support
This batching ensures system stability and predictable sync performance.
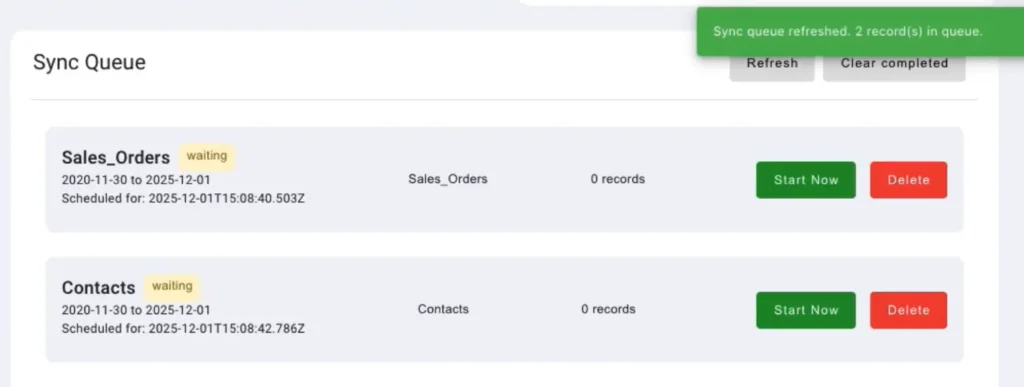
Queue Management Options
- Start Now – Begin syncing queued records immediately
- Refresh – Update the queue with the latest sync status
- Delete – Remove a module from the sync queue
- Clear Completed – Remove successfully synced records from the queue
These options help maintain a clean and manageable sync process.
Audit Logs and Error Management for Shopify integration for Zoho CRM #
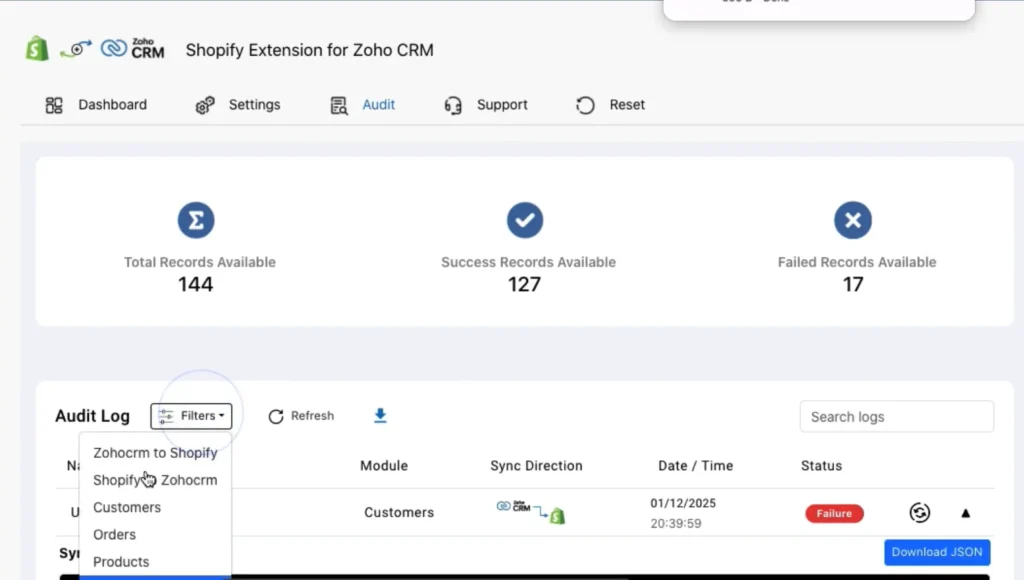
The Audit Log provides complete visibility into all synchronization activities between Shopify and Zoho CRM. It helps administrators track sync outcomes, investigate failures, and maintain data accuracy across systems.
What the Audit Log Shows
Each sync entry includes:
- Sync direction (Shopify → Zoho CRM, Zoho CRM → Shopify, or bidirectional)
- Module name (Customers, Products, Orders, Inventory)
- Record status (Success or Failure)
- Timestamp of the sync event
This record-level detail ensures transparency and traceability.
Filter and Search Options
Use built-in filters to locate specific sync records quickly
- Filter by module
- Filter by date range
- Search by record name or ID
These filters simplify troubleshooting and audits.
Re-Sync Failed Records
- Failed records can be re-synced directly from the Audit Log
- No need to re-run the entire sync process
- Helps resolve temporary API or validation issues efficiently
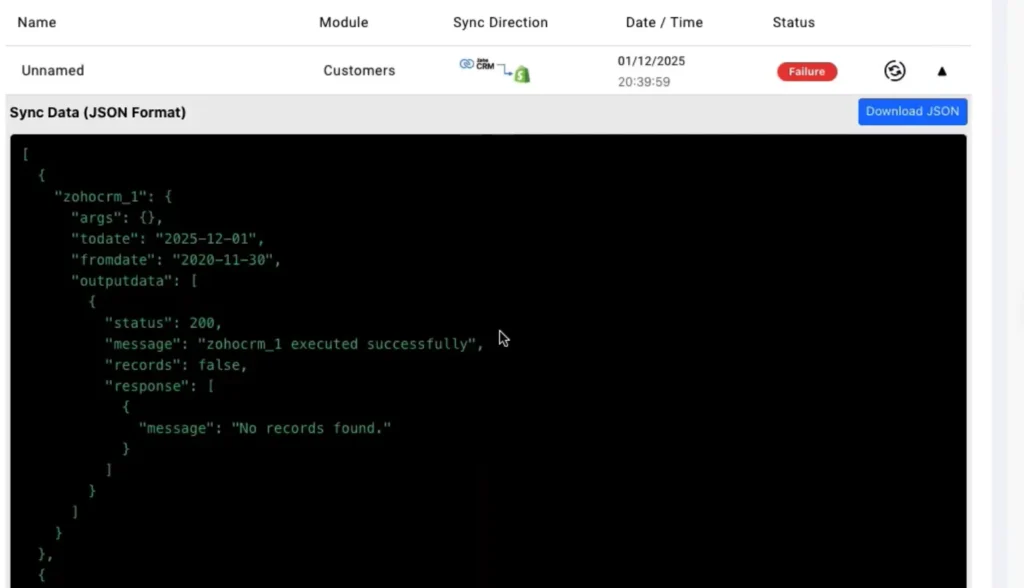
Error Details and JSON Reports
- View detailed JSON error messages for failed records
- Download error reports for deeper analysis
- Use error details to identify missing fields, permission issues, or data mismatches
This enables faster root-cause identification and resolution.
Export and Compliance Support
- Export complete audit logs for reporting
- Download failed-record reports for internal review
- Useful for compliance, monitoring, and operational audits
Reset Shopify Connection in Zoho CRM #
The Reset Connection option allows you to disconnect the currently linked Shopify store and connect a different store to Zoho CRM. This is useful when migrating stores, changing environments, or correcting an incorrect connection.
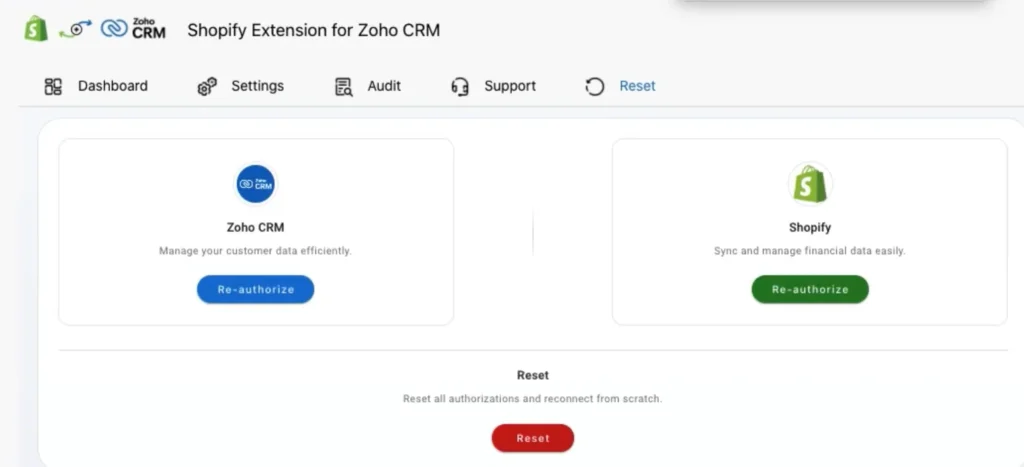
When to Use Reset Connection
- Connecting a new or different Shopify store
- Replacing an existing Shopify account
- Restarting the integration after configuration changes
- Resolving persistent authentication or data issues
How to Reset the Connection
- Open the Shopify Integration settings in Zoho CRM
- Navigate to the Settings tab
- Click Reset Connection
- Confirm the action when prompted
Once reset, you can start a fresh connection with a new Shopify store.
1. Is the Shopify Integration for Zoho CRM suitable for global businesses?
Yes. The integration is designed for worldwide use, supporting Shopify stores and Zoho CRM accounts. It works reliably for businesses operating in multiple countries and time zones, ensuring consistent data synchronization regardless of store location.
2. Does Shopify integrate with Zoho CRM?
Yes. Shopify integrates with Zoho CRM through the Shopify Integration for Zoho CRM, which enables automatic synchronization of customers, products, inventory, and orders between Shopify stores and Zoho CRM. This integration supports one-way and bidirectional data sync for centralized eCommerce and CRM management.
3. How do I connect Shopify integration for Zoho CRM?
To connect Shopify to Zoho CRM, install the Shopify Integration from Zoho Marketplace, generate a Shopify Admin API access token, and authorize the connection in Zoho CRM. Once connected, you can configure sync direction, select modules, and manage field mapping based on your business needs.
4. Is Shopify Zoho CRM synchronization bidirectional?
Yes. The Shopify Zoho CRM integration supports bidirectional synchronization, allowing data updates to flow from Shopify to Zoho CRM, from Zoho CRM to Shopify, or both. You can also define conflict-resolution rules to control which platform takes priority when the same record is updated in both systems.
Support #
If you need any assistance with configuration, contact us at [email protected]
